Remote Desktop – Connecting your Mac to your Tarleton Windows PC from home
If you are working from home on a personal computer and would like to remote into your Tarleton computer, you will need to do some preparation ahead of time. In this guide, we will walk you through this process. This guide assumes you have already been setup in Microsoft Authenticator.
If you are using your own personal computer and would like to “remote” in to your Tarleton computer, there are a handful of steps you must follow to both prepare for that environment and also execute each time you connect remotely to your Tarleton computer. The Quick Steps below outline the process.
Quick Steps
- Setup your Tarleton Windows computer to accept remote connections
- This step is required to configure permissions properly for your office machine so that you can remote in from your Mac.
- You will need to compete this step on your Tarleton computer before you leave the office. This step cannot be completed remotely.
- Identify your Tarleton device name/host name
- You will need to know the name of your Tarleton computer. Each Tarleton computer has a unique name.
- You will need to complete this step on your Tarleton computer before you leave the office. This step cannot be completed remotely.
- Install the VPN Client on your Mac
- A Virtual Private Network (VPN) is required to provide a secure network connection from a home environment to the campus network. VPN offers an additional layer of security for the network traffic from your Mac to your Tarleton computer.
- Remotely connect to your Tarleton Windows computer
- Configure the FortiNet VPN Client
Step 1: Setup your Tarleton Windows computer to accept remote connections
- On your Tarleton computer (running Windows) find the search bar in the lower-left corner of your primary monitor.

- Type “Advanced System Settings” in the search bar and click the icon that appears. It will bring up the following window:
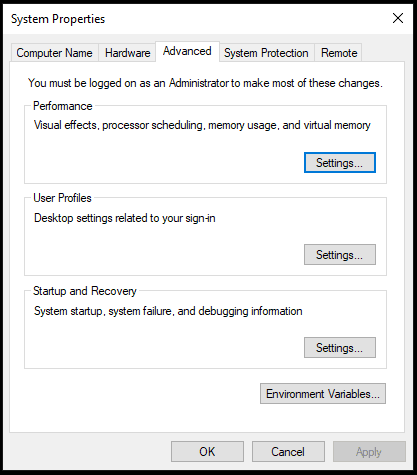
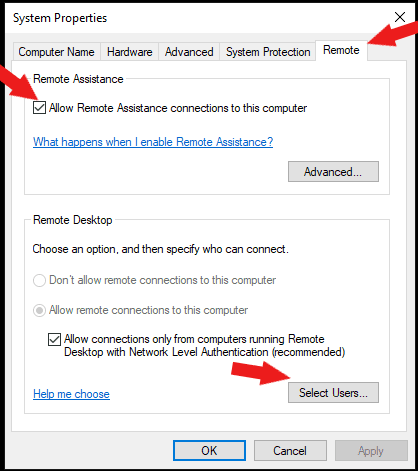
- Choose the Remote tab at the top right of the window.
- Make sure the check box next to “Allow Remote Assistance connections to the computer” is CHECKED as pictured above.
- In the lower section of this box, click on Select Users.
- The Following box should appear.
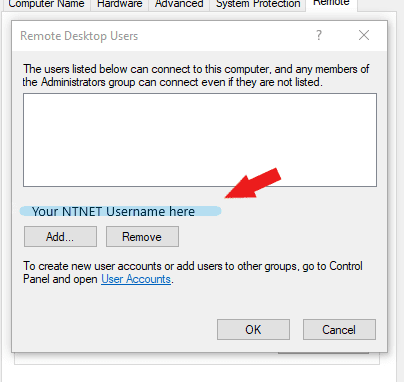
- In the highlighted section above, if your username is shown, you are already part of the Remote Users Group and you have permission to remote to your Tarleton computer. If this is not present, please make a ticket or call the help desk at (254) 968-9885.
- Once you are in the Remote Users Group, your Tarleton computer is ready to be remotely connected.
Step 2: Identifying your Tarleton device name/host name
- Now that your Tarleton computer is ready to receive a remote connection, you need to know what it is named. This is the device name/host name. To find it, go back to the search bar.

- Type in: “About your PC” and click the icon at the top of the window.
- In this window, the highlighted section seen below will have your device name/host name. Please note this device name/host name. You will need this important information when connecting from your home computer via VPN.
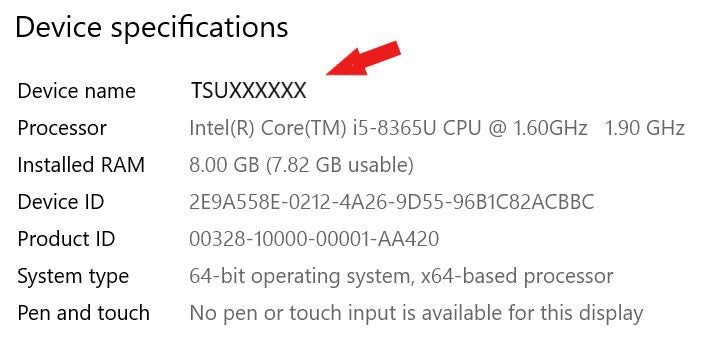
- What you should see here will have the X’s replaced with numbers unique to your computer.
Step 3: Downloading/Installing FortiNet VPN for Mac


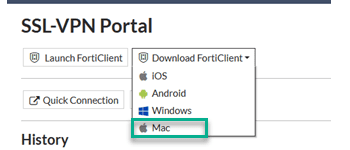
- Browse to https://vpn.tarleton.edu:10443
- Sign in with your NTNET credentials, and approve sign in request through Microsoft Authenticator Mobile App.
- You will need to authenticate Microsoft Authenticator
- Once the page has loaded, select “Download FortiClient”.

- Select “Mac” device type from the drop-down menu.
- The download will start. Once it has finished click the folder icon to open the installer file.
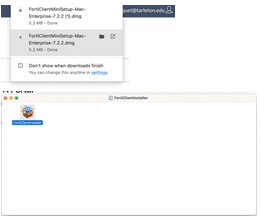
- Click the installer and select “Open” to start the download.

- Once it has finished downloading, the file will open to the “Install FortiClient” page.
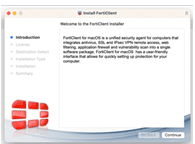
- Step through the installation defaults. Be sure to agree to the user terms, and allow the VPN Configuration pop-ups.
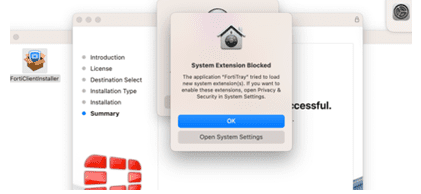
- Click “Open System Settings” on the “System Extension Blocked” pop-up.
- From the system settings, click the toggle to turn VPN on.
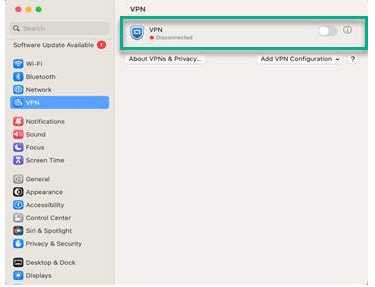
- Congratulations, you have successfully installed and enabled the FortiNet VPN Client. Please follow the Configure the FortiClient steps to get started.
Step 4: Remotely connect your Tarleton computer
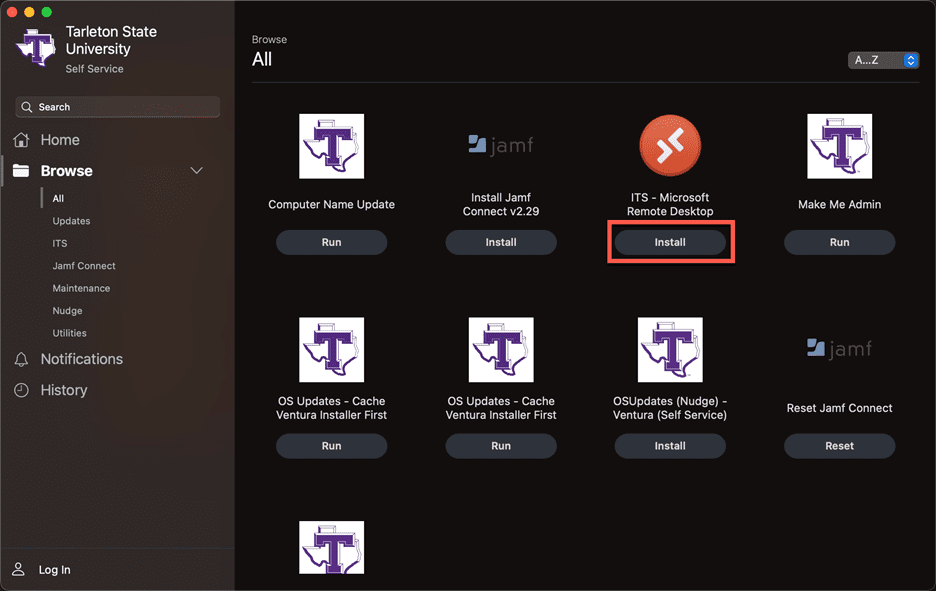
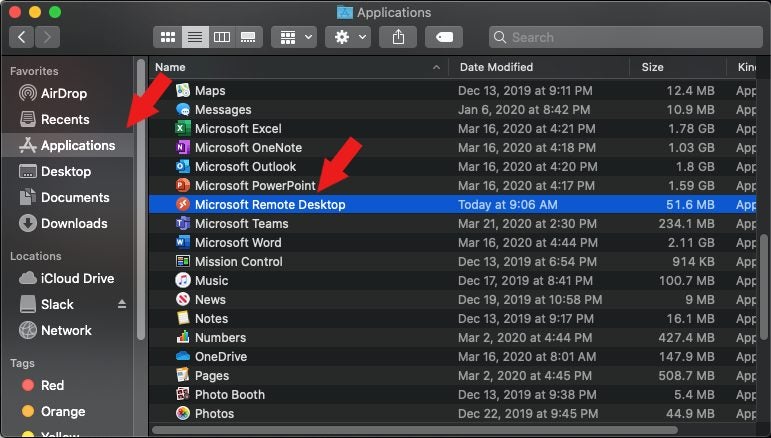
- To connect to a Windows device from your Mac device you will need to use the Microsoft Remote Desktop application. If you are using your Tarleton Mac device, you can go to the Self-Service application to install it. If you are using a personal Mac, please go to the Apple Store to download it.
- Your search result should look something like:
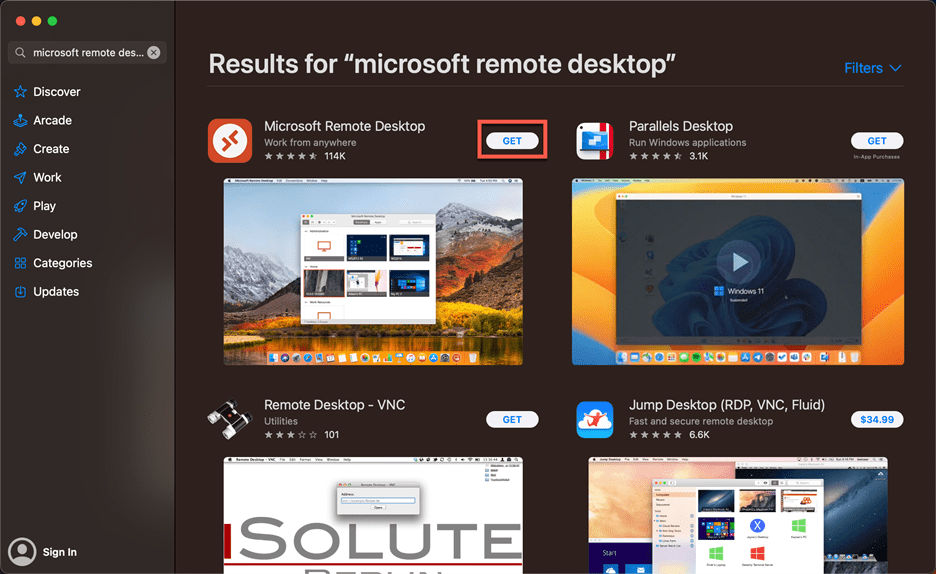
- Choose the Microsoft Remote Desktop Application
- Click on the Get button
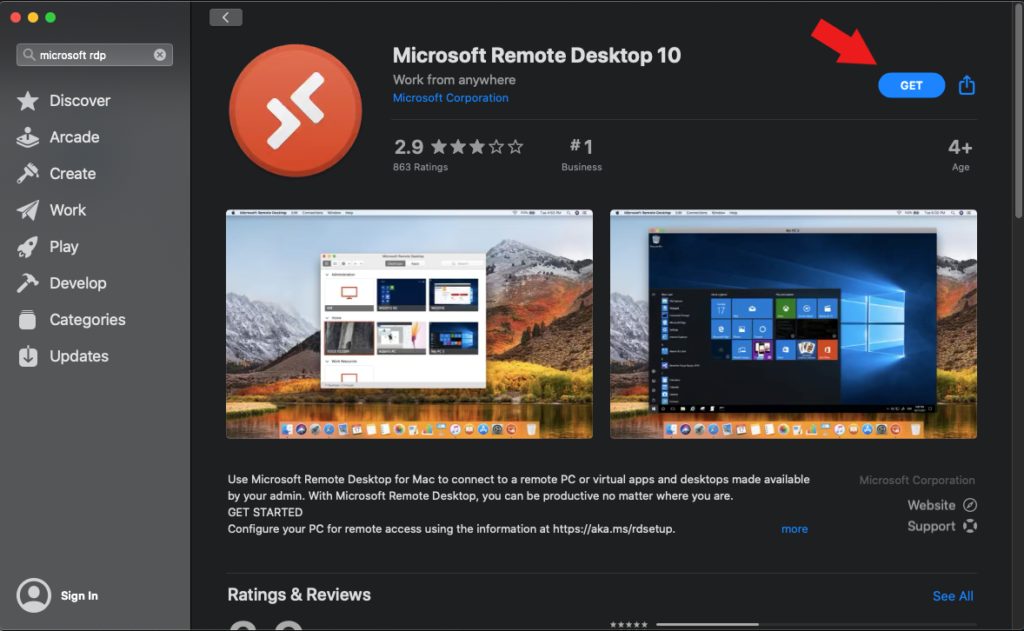
- Once downloaded, the Get button will change to a green Install button. Click this button.

- Once installed, you can open the application by opening the Finder and navigating through the applications list to the Microsoft Remote Desktop application. Double click this.

- The application will open to the following screen:
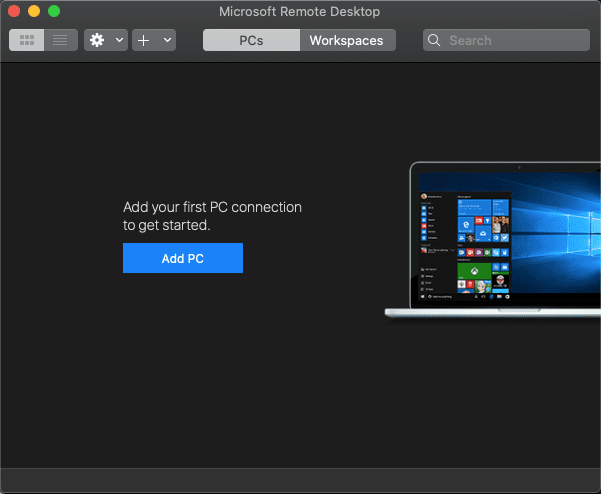
- Click the Add PC Button. The following window will appear:
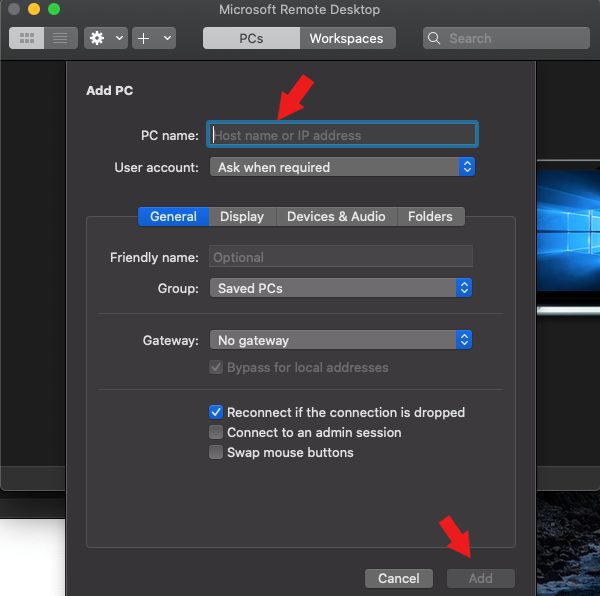
- In the PC Name field, you will need to enter the name of your office PC. Once it is entered, click the Add button at the bottom of the window.
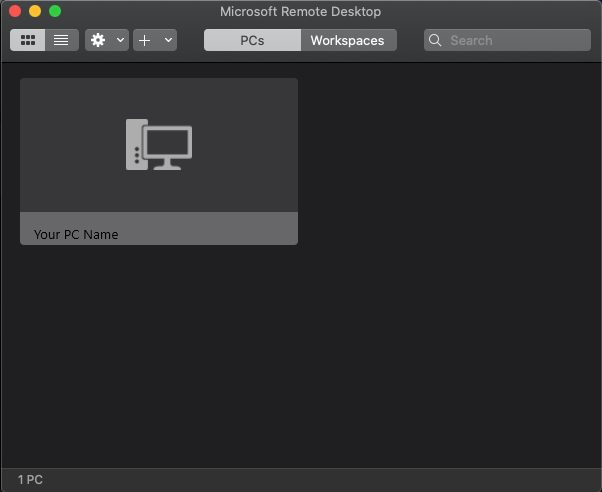
- You should see the following window. Double click the icon with your PC name.
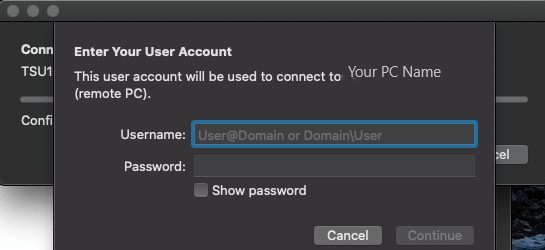
- It will prompt you for login credentials. These are your NTNET credentials. The syntax for the username is: NTNET\username
- If you are prompted with the following certificate warning, click continue.
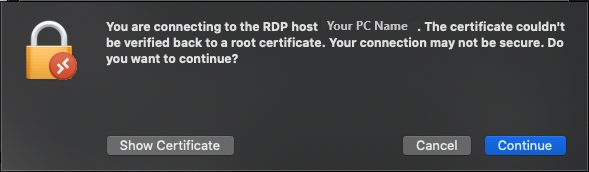
- Once you are passed this screen, you are now remote controlling your Tarleton Windows PC.
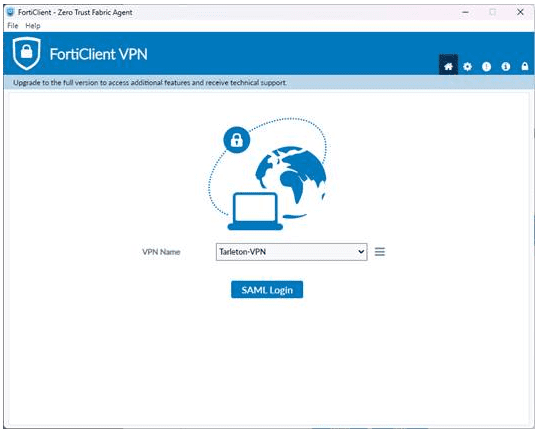
Step 5: Configure the FortiNet VPN Client
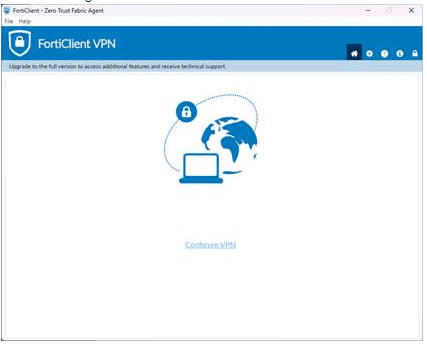
- Open the FortiClient application.
- On the first launch, you will be asked to acknowledge their application support statement.
- Select “Configure VPN”.
- Please enter the following in their respective boxes to configure the client, and then click “save”.
- Connection Name: Tarleton-VPN
- Description: leave blank
- Remote Gateway: vpn.tarleton.edu
- Customize port = 10443, check the box
- Enable Single Sign On (SSO) for VPN tunnel, check the box.
- Client Certificate: None.
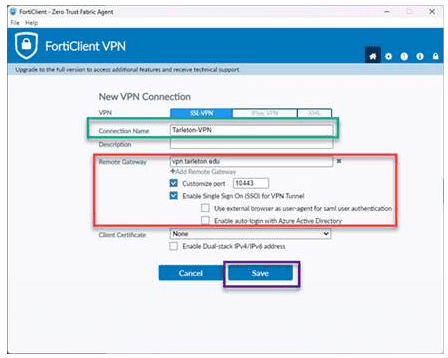
- Once the client is configured, select “SAML Login” to login.
- Sign in with your NTNET credentials.
- Once connected, you may close this window.
- Your FortiClient VPN home page will say “VPN Connected” when you are successfully connected.
If you have any questions at this point, please make a ticket or contact the help desk at (254) 968-9885.