Remote Desktop: Accessing your Mac Office Computer from Home
You may find yourself needing to work from home but will need to be able to access data and files found on your office Mac computer. You can do this by setting yourself up ahead of time and this guide will help make that process easier. This guide assumes you have set up Microsoft Authenticator and know how to use it.
Quick Steps
- Preparing your office Mac for remote connection
- This step is required to configure your office Mac to allow you to connect using your personal Mac from home.
- This needs to be done from your office Mac before you leave. It cannot be done remotely.
- Identifying your office Mac’s name
- You will need the name of your Mac in order to remote connect.
- You will need to do this before you leave. It cannot be done remotely.
- Downloading/installing VPN on personal Mac
- This application is what allows you into our network from a remote location. It provides a secure tunnel into the Tarleton network and maintains the necessary safeguards to protect our data.
- Configure the FortiNet VPN Client
- Connect to your Mac
Step 1: Preparing your office Mac for remote connection
- To make the following changes on your Mac device please launch Make Me Admin first by opening the Self Service application and clicking Run.
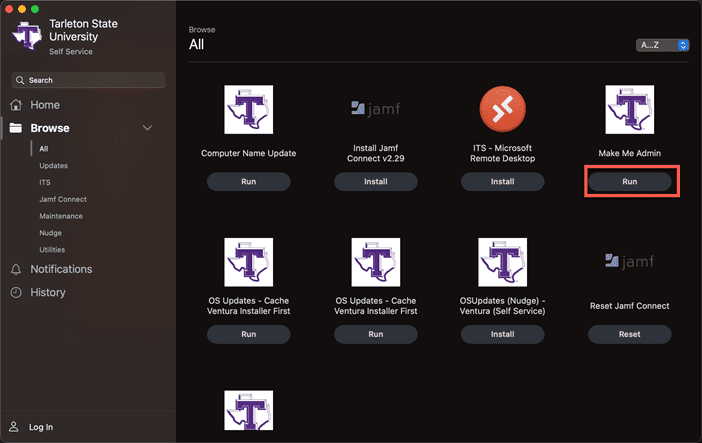
- Click on Continue to initiate the 30 minutes of administrative rights.

- Now go to System Settings to allow your user account to remote the device. Click on General>Sharing.

- Ensure that Remote Management is enabled and click on the [I] icon to edit the settings.

- Click on the plus (+) icon to add a user.

- Select your user and click on Select.

- The below window will appear, enable all of the options and click OK to close this window.

- Click Done to close the window.

Step 2: Identifying your office Mac’s name
- Finally, identify the computer name (hostname) of your device for when you try to remote into it. This is found under System Settinggs>General>About>Name.

Step 3: Downloading/Installing VPN on personal Mac


- Browse to https://vpn.tarleton.edu:10443
- Sign in with your NTNET credentials, and approve sign in request through Microsoft Authenticator App.
- You will need to authenticate Microsoft.
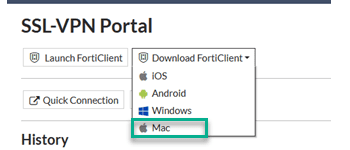
- Once the page has loaded, select “Download FortiClient”.

- Select “Mac” device type from the drop-down menu.
- The download will start. Once it has finished click the folder icon to open the installer file.
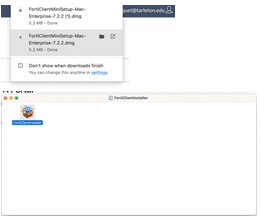
- Click the installer and select “Open” to start the download.

- Once it has finished downloading, the file will open to the “Install FortiClient” page.
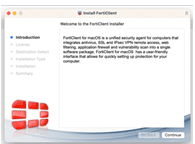
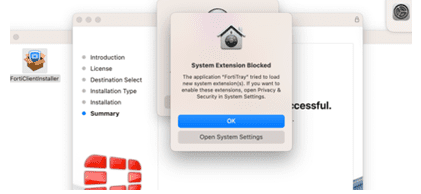
- Step through the installation defaults. Be sure to agree to the user terms, and allow the VPN Configuration pop-ups.
- Click “Open System Settings” on the “System Extension Blocked” pop-up.
- From the system settings, click toggle to turn VPN on.
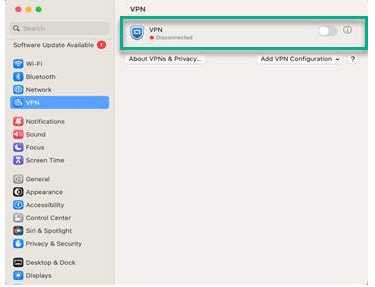
- Congratulations, you have successfully installed and enabled FortiNet VPN Client. Please follow the Configure the FortiClient steps to get started.
Step 4: Configure the FortiNet VPN Client
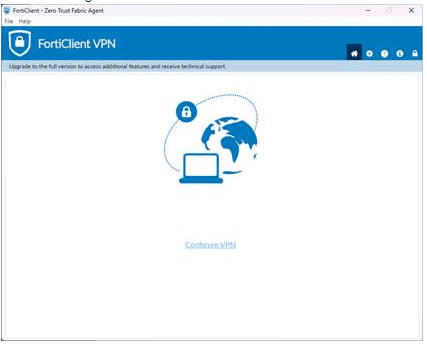
- Open the FortiClient application.
- On the first launch, you will be asked to acknowledge their application support statement.
- Select “Configure VPN”.
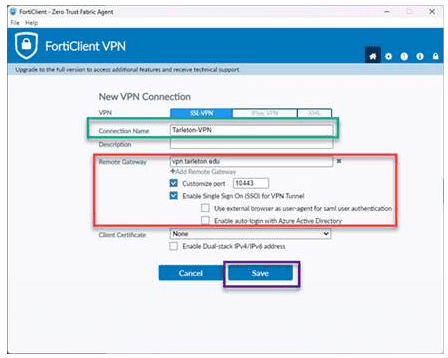
- Please enter the following in their respective boxes to configure the client, and then click “save”.
- Connection Name: Tarleton-VPN
- Description: leave blank.
- Remote Gateway: vpn.tarleton.edu
- Customize port = 10443, check the box.
- Enable Single Sign On (SSO) for VPN tunnel, check the box.
- Client Certificate: None
- Once the client is configured, select “SAML Login” to login.
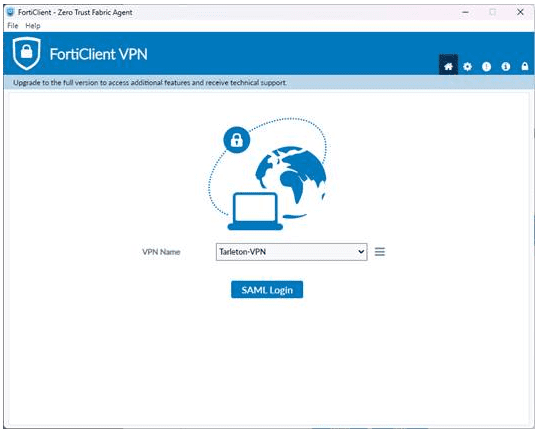
- Sign in with your NTNET credentials.
- Once connected, you may close this window.
- Your FortiClient VPN home page will say “VPN Connected” when you are successfully connected.
Step 5: Connect to your Mac
- To remote into a Mac device from another Mac you will use the Screen Sharing application. Enter the computer name of your device and click Connect.

- Enter your NTNET credentials to authenticate. Click Sign In and you will then be connected to your device.
